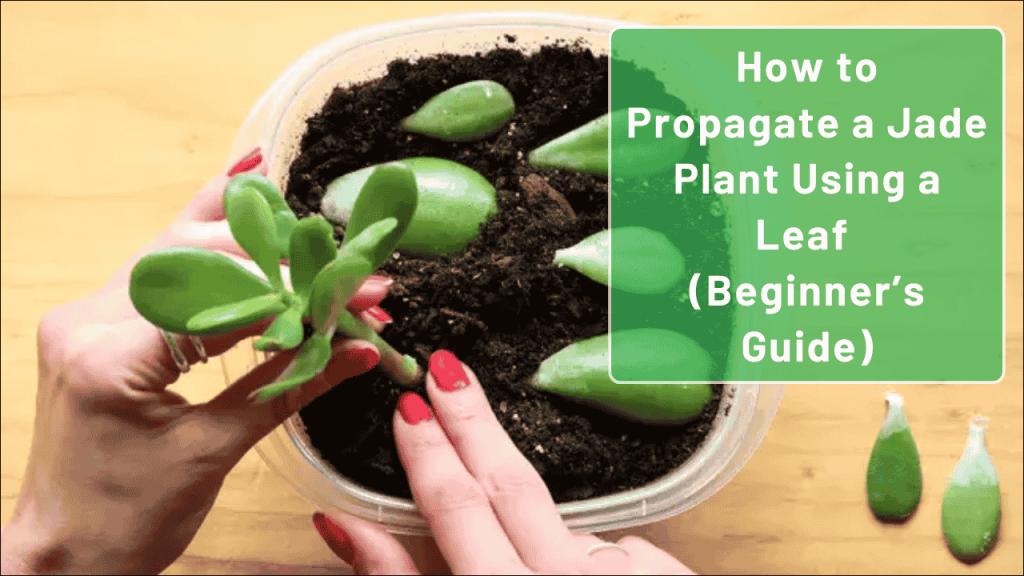
Jade plants (Crassula ovata) are beloved houseplants known for their thick, glossy leaves and tree-like appearance. These succulent plants are not only attractive and low-maintenance but also incredibly easy to propagate—especially from leaves. Whether you’ve accidentally knocked a leaf off your existing plant or you’re looking to expand your collection without buying new plants, this beginner’s guide will walk you through the simple process of propagating jade plants from a single leaf.
Table of Contents
Why Propagate Jade Plants from Leaves?
Leaf propagation is one of the most accessible methods for beginners to multiply their jade plants. Here’s why this method is worth trying:
- Resource Efficient: Only requires a single healthy leaf
- Non-invasive: Doesn’t require cutting stems from a parent plant
- Cost-free: Creates new plants without any purchase
- Beginner-friendly: Simple process with high success rates
- Rewarding: Watching a whole new plant develop from just a leaf
What You’ll Need
Before you begin, gather the following supplies:
| Supply | Purpose |
|---|---|
| Healthy jade leaf | Source material for propagation |
| Small pot(s) | Container for growing new plants |
| Well-draining succulent soil | Growing medium that prevents root rot |
| Rooting hormone (optional) | Encourages faster root development |
| Spray bottle | For gentle misting during early stages |
| Small pebbles (optional) | For decorative top dressing |
| Clean scissors or knife | For clean cuts if needed |
Step-by-Step Leaf Propagation Guide
1. Selecting the Perfect Leaf
The first and most crucial step is choosing the right leaf for propagation. The success rate of your propagation largely depends on this selection.

What to look for:
- Choose plump, healthy leaves with vibrant color
- Select mature leaves (not newly formed ones)
- Avoid leaves with spots, discoloration, or damage
- Look for leaves from the middle or bottom of the plant
How to remove the leaf:
- Gently twist the leaf from side to side while pulling away from the stem
- Ensure you get the entire leaf, including the base where it attaches to the stem
- The leaf should come off cleanly with a slight “snap”
Important: Make sure you get the complete leaf with its base intact. If the leaf breaks and leaves part of itself on the stem, it likely won’t propagate successfully.
2. Allowing the Leaf to Callus
Before planting, the leaf needs to form a protective callus over its wound to prevent rotting.
- Place the removed leaf on a clean, dry paper towel
- Keep it in a warm, dry location away from direct sunlight
- Allow it to sit undisturbed for 2-5 days
- The cut end will develop a callus (dry, slightly hardened tissue)
Pro Tip: The drying time may vary depending on your climate. In humid environments, it might take longer for the callus to form properly.

3. Preparing the Soil and Container
While waiting for the leaf to callus, prepare your growing medium:
- Choose a small pot with drainage holes (2-3 inches in diameter is ideal)
- Fill with well-draining cactus/succulent soil (or make your own by mixing regular potting soil with perlite or coarse sand at a 1:1 ratio)
- Lightly moisten the soil before planting (should be damp but not wet)
Ideal Soil Mix Formulation:
| Component | Proportion | Purpose |
|---|---|---|
| Cactus/succulent soil | 50% | Base growing medium |
| Perlite or pumice | 40% | Improves drainage |
| Coarse sand | 10% | Adds weight and further drainage |
4. Planting the Callused Leaf
Once the leaf has formed a callus, it’s ready for planting:
- Optional: Dip the callused end in rooting hormone (this can increase success rates and speed up rooting)
- Create a small indentation in the soil surface with your finger
- Place the leaf either:
- Standing upright with the callused end pushed slightly into the soil (more challenging but can yield better results)
- Laying flat on the soil surface with the callused end just touching the soil (easier method for beginners)
- For the flat method, you can partially bury about 1/4 inch of the leaf end in the soil
- Gently press the soil around the leaf to provide support
Important: Do not bury the entire leaf—most of it should remain above the soil to continue photosynthesizing.
5. Care During the Rooting Phase
The initial rooting phase requires specific care to encourage successful propagation:

| Factor | Requirements | Avoid |
|---|---|---|
| Light | Bright, indirect light | Direct, harsh sunlight |
| Water | Light misting around the leaf base every 5-7 days | Overwatering or wetting the leaf surface |
| Temperature | 65-75°F (18-24°C) | Cold drafts or extreme heat |
| Humidity | Normal room humidity | Very high humidity (can cause rot) |
Watering Technique: Use a spray bottle to lightly mist the soil around the base of the leaf. The goal is to provide minimal moisture—overwatering is the most common cause of propagation failure.
6. The Waiting Game: Timeline and What to Expect
Patience is essential when propagating jade plants from leaves. Here’s what to expect:
| Time Period | Development Stage |
|---|---|
| Weeks 1-2 | Callus forms, no visible changes |
| Weeks 3-4 | Roots begin to develop but may not be visible |
| Weeks 5-8 | Small roots become visible at the leaf base |
| Weeks 8-12 | Tiny plantlets (baby jade plants) form at the base |
| Weeks 12-16 | Plantlets develop their first small leaves |
| Months 4-6 | Original leaf may begin to wither as plantlets grow |
Growth Indicators: The original leaf will eventually begin to wrinkle and shrink as it transfers its stored nutrients to the new plantlets. This is normal and actually a sign of successful propagation.
7. Transitioning to Regular Care
Once your plantlets reach about 1 inch in height and have developed several sets of leaves, you can transition to regular jade plant care:
- Begin a normal watering schedule (allowing soil to dry completely between waterings)
- Start providing diluted fertilizer (1/4 strength) once every 1-2 months during growing season
- Gradually introduce more direct light if desired
Troubleshooting Common Problems
Even experienced gardeners occasionally encounter issues when propagating. Here’s how to address common problems:

| Problem | Possible Causes | Solutions |
|---|---|---|
| Leaf rotting | Overwatering, poor drainage, or insufficient callusing | Remove rotting leaf, ensure proper drainage, allow longer callusing time for new attempts |
| No roots forming after 8+ weeks | Incomplete leaf removal, improper environmental conditions | Check temperature and light conditions, try again with a fresh leaf ensuring complete removal |
| Roots form but no plantlets appear | Patience needed, or insufficient nutrients | Continue regular care, consider very dilute fertilizer application |
| Leaf shrivels without producing plantlets | Insufficient moisture or leaf damage | Slightly increase watering frequency, ensure leaf is undamaged when propagating |
| Plantlets emerge but fail to thrive | Inadequate light or nutrients | Move to brighter location, begin light fertilization once roots are established |
Factors Affecting Success Rates
Several factors influence how successfully your jade leaf propagation efforts will be:
| Factor | Optimal Conditions | Impact on Success |
|---|---|---|
| Season | Spring and summer (active growth period) | Higher success rates during warm months |
| Parent plant health | Healthy, well-established plant | Stronger, more viable leaves for propagation |
| Leaf selection | Complete, undamaged mature leaves | Higher viability and nutrient stores |
| Environmental consistency | Stable conditions without extremes | Reduces stress during vulnerable rooting phase |
| Patience | Allowing sufficient time for development | Prevents premature transplanting or overcare |
Moving Forward: Care for Your New Jade Plants
Once your leaf propagation has been successful and the new plants are growing steadily, here’s how to care for them long-term:
- Potting Up: When plantlets are about 2-3 inches tall, consider moving them to individual pots
- Light: Provide bright, indirect light with some direct morning sun as plants mature
- Watering: Allow soil to dry completely between thorough waterings
- Feeding: Fertilize lightly during the growing season (spring and summer) with a balanced, diluted succulent fertilizer
- Temperature: Maintain temperatures between 65-75°F (18-24°C), protect from frost
- Pruning: Begin shaping your new plants once they’re well-established (typically after a year)
Additional Tips for Success
- Multiple Attempts: Try propagating several leaves at once to increase your chances of success
- Natural Leaf Drop: Fallen leaves from your jade plant often make perfect propagation candidates
- Propagation Station: Create a dedicated area with optimal conditions for all your propagation projects
- Record Keeping: Track dates and methods to learn what works best in your specific environment
- Seasonal Timing: While possible year-round, spring and summer propagation typically yields the best results
Conclusion
Propagating jade plants from leaves is a rewarding and accessible project for beginners. With minimal supplies, the right technique, and a bit of patience, you can expand your plant collection and experience the satisfaction of growing new plants from a single leaf. As you gain experience, you may find your success rates improving, allowing you to share your propagation skills—and new jade plants—with friends and family.
Remember that plant propagation is part science, part art, and always an opportunity to learn. Even if your first attempts aren’t successful, each try builds your knowledge and brings you closer to mastering this enjoyable aspect of plant care.
FAQs
How long does it take for a jade leaf cutting to root? Jade leaf cuttings typically begin developing roots within 3-8 weeks, though complete plantlet formation may take 3-4 months.

Can I propagate jade leaves in water instead of soil? While possible, soil propagation has a higher success rate for jade leaves as they’re prone to rotting in water.
Do I need to use rooting hormone when propagating jade leaves? Rooting hormone isn’t necessary but can increase success rates and speed up the rooting process.
What’s the best time of year to propagate jade plants from leaves? Spring and summer provide optimal conditions for successful propagation as the plant is in its active growth phase.